Using Fabric To Deploy EC2 Instances
This article goes on to explain how you can use fabric to deploy EC2 instances with a single command on Ubuntu. I’m sure the steps are fairly similar with other Linux distros. We will cover how to setup your user’s ssh-key, as well as SSL certificate for use with the AWS API and finally what the fabric task looks like that actually does our deployment.
Configuring Your EC2 Account
The first thing we need to do is make sure all of the right “stuff” is configured in our AWS account. Specifically we need to make sure we have “Key Pairs” this allows for ssh access to our EC2 instances. We also need to make sure our account has a “Signing Certificate” assigned to it for API access.
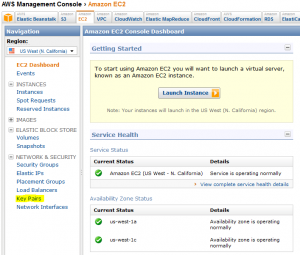
First, lets setup our “Key Pairs”, under the EC2 tab in your AWS Management Console select “Key Pairs” on the left hand side:
Next, we want to “Create Key Pair”. When you click the “Create Key Pair” button you will need to give the Key Pair a name, for instance yourname_key. After you press “Create” you will be prompted to download a .pem file. This file is your “private key” you will want to make sure that you don’t share this key with anyone.
Now that we have a “Key Pair” lets create our “Signing Certificate”. Amazon doesn’t complete this step for you, so on your Linux desktop, the one which will actually be running the fabric task which does the EC2 deployment we need to create our X.509 certificate:
openssl genrsa -out ./private-key.pem 4096
openssl req -new -x509 -sha1 -days 3750 -key private-key.pem -out ./cert.pem
Now that we have our self signed certificate its time to upload it to EC2. From the AWS Management Console we will want select the “IAM” tab from the top, then click on “Users” on the left:
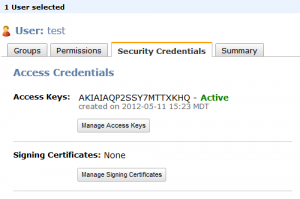
Next, on the right hand side click on your user and you will see a button for “Signing Certificates” you will want to press “Manage Signing Certificates”:
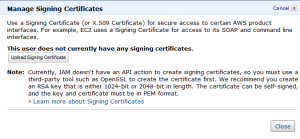
On the next window press the”Upload Signing Certificate” button:
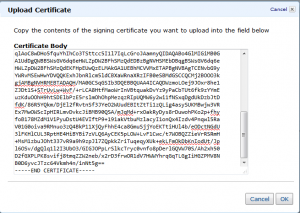
This is where we are going to paste in the cert.pem that we created earlier:
Finally, we are going to create a “Security Group” which will allow us ssh access into our server for management purposes. Depending on how you are going to use this server you might want to enable other ports such as 443 or 80.
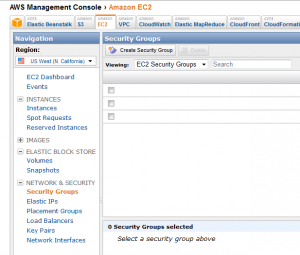
Go to your EC2 tab, and this time select the “Security Groups” link on the bottom left:
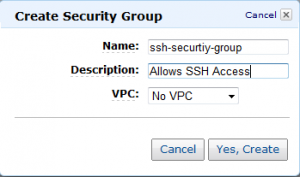
Next we are going to press the “Create Security Group” button on the right and give the security group a name, and description:
Now that we have all of that setup, we are going to create a directory from which to store all of these files, lets call it ~/awsdeploy for now. In that directory we need to make sure we have the following files:
- cert.pem (this is the certificate we pasted into AWS)
- private-key.pem
- yourname_key.pem (this is the ssh private key we will use to ssh into our instance)
Configuring The Desktop
Now that we our aws account all setup, we need to complete a few other steps to get our fab task working. We need a few Ubuntu packages to get started. First we will install the ec2-api-tools:
sudo apt-add-repository ppa:awstools-dev/awstools
sudo apt-get update
sudo apt-get install ec2-api-tools
This is going to install all the necessary tools which we need to interface with the AWS API for building and deploying our EC2 instances. Next we want to configure either our ~/.bashrc file or simply create an awsdeploy.bashrc file which we will source in our fabric file later on with the following content:
export AWSDEPLOYPATH=~/awsdeploy/
export EC2_KEYPAIR=username_key # name only, not the file name, this is name given in the AWS GUI
export EC2_PRIVATE_KEY=${AWSDEPLOYPATH}/private-key.pem
export EC2_CERT=${AWSDEPLOYPATH}/cert.pem
export SGROUP=ssh-security-group # This is the name in the AWS GUI
export JAVA_HOME=/usr/lib/jvm/java-6-openjdk/
Finally, we want to make sure that Fabric is installed:
sudo pip install PyCrypto --upgrade
sudo pip install Fabric --upgrade
The Fabric Task
The fabric task which makes all of this possible is quite simple. The fabric task is simply going to call a single command and build out the EC2 instance. Why use fabric for this? Well this simple fab task can be wrapped into larger fab tasks which can then we leveraged to do full application stack deployments. In a later blog post I plan to write an entry oh how to do a single fab task full blown mongodb deployment. The fab task is posted below and will make the following EC2 instances:
- Region: us-west-1
- Volume: EBS
- Size: Variable
- OS: Ubuntu 12.04 64-bit
https://gist.github.com/2695632
To run this fab task we simply run the following command:
fab deploy_small_ec2_instance
We will get output similar to the following:
RESERVATION     r-a71e08e0      880935304611
INSTANCE        i-f29a2ab4      ami-6dacf728                    pending awsdeploy_key   0               m1.small        2012-05-14T18:56:14+0000        us-west-1a   aki-8d396bc8                    monitoring-disabled             10.52.201.20    vpc-d13b8ab8    subnet-d43b8abd ebs                                 paravirtual      xen             sg-926578fe     default

Done.
Finally, we want to name the EC2 instances:
ec2-create-tags ami-6dacf728 i-f29a2ab4 --tag Name=name_of_app_or_function
We should now see our new EC2 instance in the AWS Management Console with our new name.
